|
On March 19 2008, I finished my qin table. I have had this idea for a couple years that I want to have a portable qin table that is not too heavy to carry, easy to assemble, no nails, stable, not too tall and not too sort, nice looking and nice sounding, so I can take it with me when I travel. I started to pay attention to Chinese traditional furniture, and qin tables for ideas in 2006 . On Feb 4th 2008 I used illustrator to draw my ideas. .  At that moment, I wasn't really sure if this design was achievable. I put it on my yahoo blog and one blog friend, CC, gave me very good suggestions such as that to make a table, is like building a house. One has to start from the bottom (legs) and if the legs are stable, the table will be stable. Another blog friend, Qinxiaoyin, suggested that I need to consider carefully if I really need a sound box, because it might become that when playing qin, you'd rather hear the real qin sound, you might end up hearing the table's sound instead. I very much appreciated their valuable suggestions. For the wood materials, I wanted to use hard wood but since this is my first try, I used available wood from near-by wood store. Therefore on March 3rd 2008, I went to a Home Depot in my neighborhood and bought a piece of fir for legs and 2 pieces of pine for sound box (at that time, I still believed that I was going to make a sound box). And a piece of 12”X36” one inch thick plywood for table top for practice. Buying this plywood was a wrong decision. While I was practicing making some tenons on this piece of plywood, I found it is very hard to work and I tried to put qin on top of it and did not like the sound quality at all. So I gave it up later and went back to the store and bought a piece of 11 1/2” x 36” one inch thick oak to be my table top. On March 6, I went to the library and borrowed 4 books about wood working. There were 2 books that really helped me a lot. One is “Woodworker's Hand Tools” and the other is “Woodworking 101 for Women.” I learned how to use chisels and saws, how to make dovetail joins, Mortise and Tenon from these books. After reading these book, I knew how to chose the right tools for my needs. So on March 12, I bought 1/2” and 1/4” chisels, some clamps, a dovetail saw, rip saw, 90 degree ruler, wood glue, safety goggles, small hammer etc,. 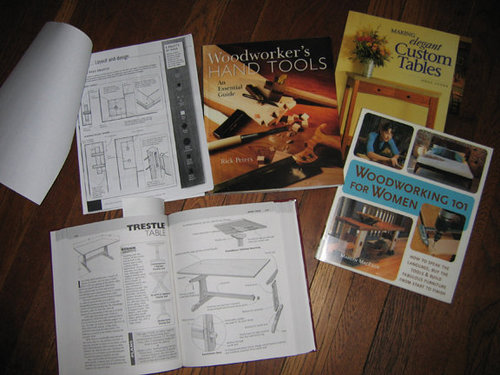   When I finished all the pieces of legs, I joined them together and put the oak wood on top of the legs and tried the sound quality. It actually sounded very good, better than my expectation. But when I finished the table top and put everything together, I realized that my legs were not comfortable because I did not give enough space in between the left side legs and the right side legs. Also the lower bar made me not sure where I wanted to put my foot, out side or inside. I was frustrated at this moment. I decided to re-do the upper bar and was thinking do I really need the lower bar? It turns out that I don't really need the lower bar, the table is stable enough. So I just needed to re-do the upper bar to support both sides of legs. I did not have any more fir and did not want to buy more, so I used a piece of pine that my hubby bought for me to practice dovetail joins. I used it to make the upper bar, then put the table top back. The result is not bad. I like it a lot. So I decided that there is no need to make a sound box and better not to try it before I destroy the whole project. 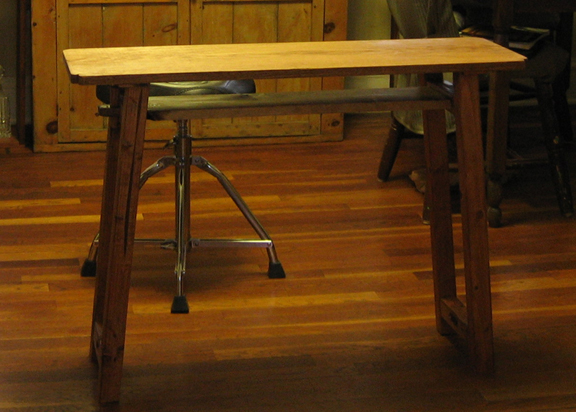 This table is all using Mortise and Tenons and pegs to fit together. Since I used all hand tools, each tenon's size is slightly different, so are the pegs. Therefore, this table has certain joint directions. Each piece I made some notches to distinguished. Even the top board has direction too. So if taking apart of them, I can easily put them back together.   When playing qin on this table, I feel I and my qin and the table form a whole which I feel really good. My dear hubby says “good job.” 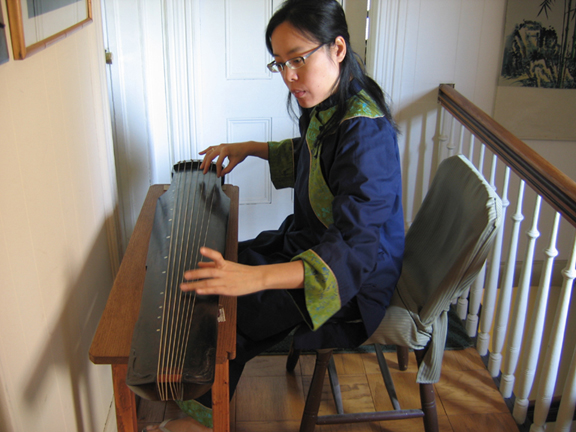 Peiyou 4/5/2008 On March 1st, 2019, I decided to change the table top from oak to pine. (I don't remember when I paint it to the dark color, ebony)  Glad that I still had enough ebony stain left for me to finish the whole new piece of pine. The resonance does feel better than oak. 3/6/2019  | ||||